You know the basics of the git workflow and are familiar with some basic commands like add, commit, push, pull? Then maybe this post is for you. This post is mainly focused on daily git use improvement, fixing some common mistakes, and a step towards becoming an advanced git learner.
Scenario with add
You just want to add files with a specific extension to your staging area. Of course you can add all the files one by one. But you can use *.<extension_name> to include all files with that extension. The following command will add all python files.
git add *.pyYou want to add files with a specific extension and also want to specify a directory name, then you can run the following command. It will add all python files from sub directories of the models/ directory.
git add models/\*.pyScenario with clean
You created some new files or folders in your branch. After some time you realized that you don’t want those files or folders. You need your working tree clean. These are untracked files in git.
Untracked files are those which you didn’t add already using git add.
To make your working tree clean you can run the following command. This will delete all files and directories that are not tracked by git.
git clean -dfIf you want to see which untracked files will be removed before removing them, then you can run this command.
git clean -dnScenario with rm
Now you want to delete your tracked files. You can delete a tracked file using this command.
git rm <file-path>If your file is in the staging area then you have to give an additional force flag.
git rm <file-path> -fYou want to delete files from the git repository but not from your file system, then you can run this command.
git rm --cached <file-path>Scenario with branch
You have made a typo in your branch name or you want to change your branch name. The following command will change your branch name.
git branch -m <old-branch-name> <new-branch-name>You want to change the current branch name, then you can just run the following command.
git branch -m <new-branch-name>If you’ve already pushed the branch with the old name, then there are a couple of extra steps required. You need to delete the old branch from the remote and push up the new one.
git push <remote-name> --delete <old-branch-name>
git push <remote-name> <new-branch-name>
You want to push your local branch code but your local branch name doesn’t match the name of the remote repository branch. Then you can run the following command.
git push <remote-name> <local-branch-name>:<remote-branch-name>Scenario with log
You want to see your commit history so you just ran a git log command. This shows a lot of information but you just need to see the commit id and message. Then you can run the following command.
git log --onelinegit log --oneline will show the following kind of output.
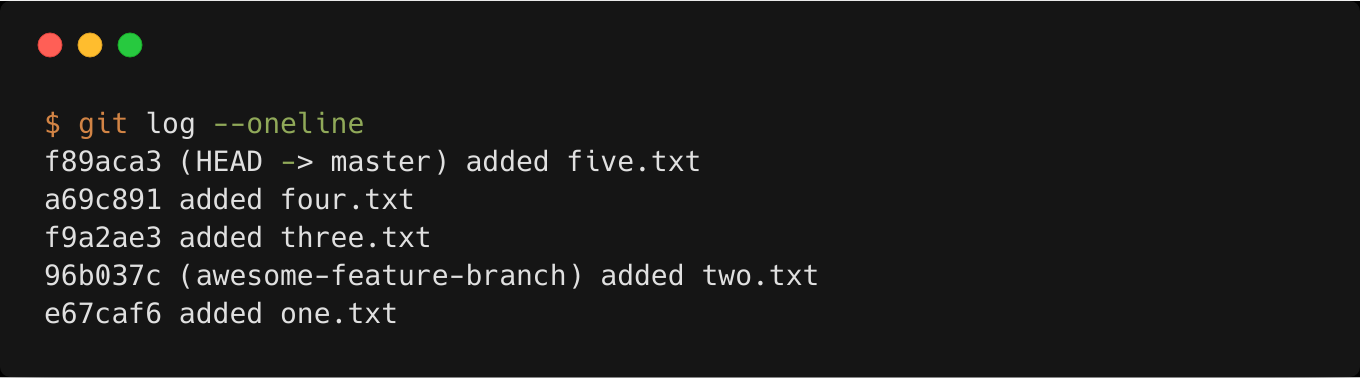
The first seven characters in the above output are the shorthand commit id and then we have our commit message. The commit id is shorthand because the full commit id is forty hexadecimal characters that specify a 160-bit SHA-1 hash. Notice HEAD -> master. This means we are now in the master branch.
If you want to see the commit message of a specific author, then you can run the following command. I am assuming the author name is John Doe.
git log --author="John Doe"Scenario with stash
You are working in a branch and made some changes. Now you want to just see the output or code of that branch before you made those changes. Then you can run the stash command. It will make your working tree clean.
git stashIf you want your changes back then you have to run the following command.
git stash popIf you don’t want those changes back then you have to run the following command.
git stash dropYou changed some files in the wrong branch. Then you can stash your changes, checkout to your desired branch, and run git stash pop there. You will get your changes in your desired branch.
Scenario with checkout
You want to switch to a branch. Then you can just run the following command.
git checkout <branch-name>If you already changed some files in your current branch, then be sure to stash your changes or commit them. If you don’t stash or commit those changes, they will also reflect in your switched branch, which you may not want or need.
You have a branch named development and you want to make a branch from development and switch to your new branch directly. Then you can run the following command.
(development)$ git checkout -b <your-new-branch-name>You can also checkout using a commit id. You can use the shorthand commit id safely if your project isn’t very large.
git checkout <commit-id>This will fall into a detached head state in git. Head is simply a reference to the current commit (latest) on the current branch. Generally, Head in git can point to a branch or a commit. When Head points to a branch, git doesn’t complain. But when Head points to a commit, but not a branch, then it goes into a detached head state.
You want to develop a feature from this detached head state, then you have to make a branch from this state and develop your feature there.
git checkout -b <your-new-branch-name>Scenario with commit
You just added a commit message and realized that there is a typo in your commit, or you just want to make your commit message more expressive and understandable. Then you can use the following git command.
git commit --amend -m "your-new-commit-message"If you just added some files or fixed a bug but don’t want to add another commit message, then you can use the following git command with the --no-edit flag.
git commit --amend --no-editHere one thing is very important to remember: amending the last commit rewrites the commit history. It means your commit id will change when you amend a commit.
If you already pushed your code to the remote repository and then you realized that you have to amend your commit message, then after amending you have to make a force push. Assuming your remote name is origin, you can run the following command.
git push origin <branch-name> -fScenario with reset
You want to discard your last some commits. Then you can use git reset to discard those commits. There are three flags for git reset that you should know.
--soft--mixed--hard
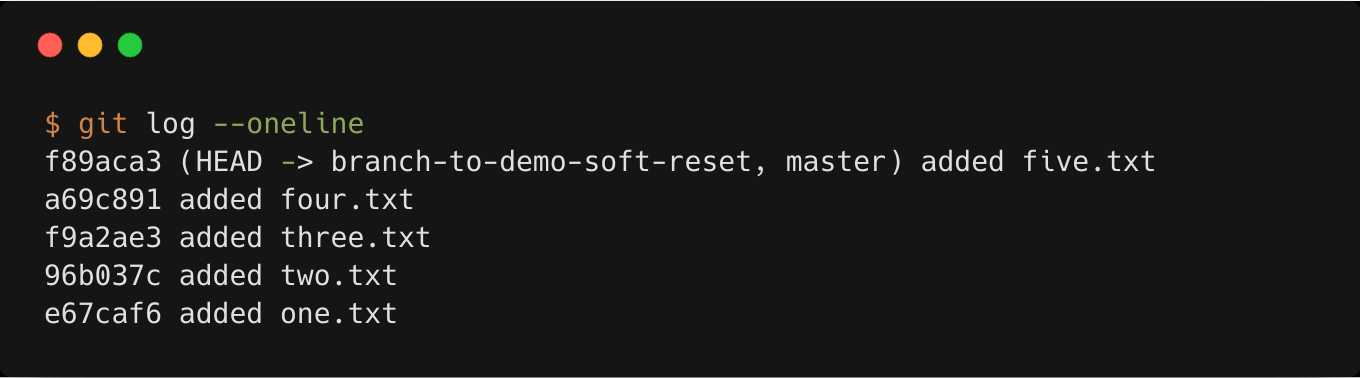
Let’s assume you want to discard the changes up to added two.txt which has commit id 96b037c.
Now let’s run the git reset command with the --soft flag.
git reset --soft 96b037cgit reset --soft will orphan all the commits after that commit id (e.g. 96b037c) but the files will not be deleted. The files will be in the staging area.
Orphaned commit means there is no direct path from a ref to access them. These orphaned commits can usually be found and restored using git reflog. Git will permanently delete any orphaned commits after it runs the internal garbage collector. By default, git is configured to run the garbage collector every 30 days.
So if you run git status you will see the following output.
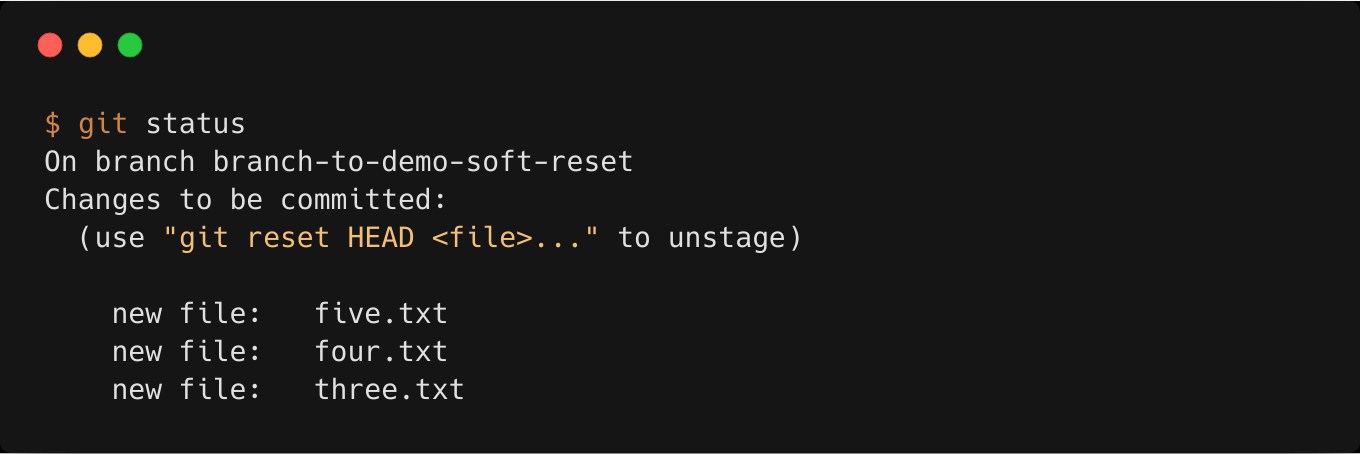
If you run git log --oneline you will see that the previous commits are deleted.

If you run the reset command with the --mixed flag then your commits will be orphaned and the files will not be in the staging area, but the files will be found in the file system. If you don’t specify any flag in reset then git will use the --mixed flag as default.
If you run git status then you will see the following output.
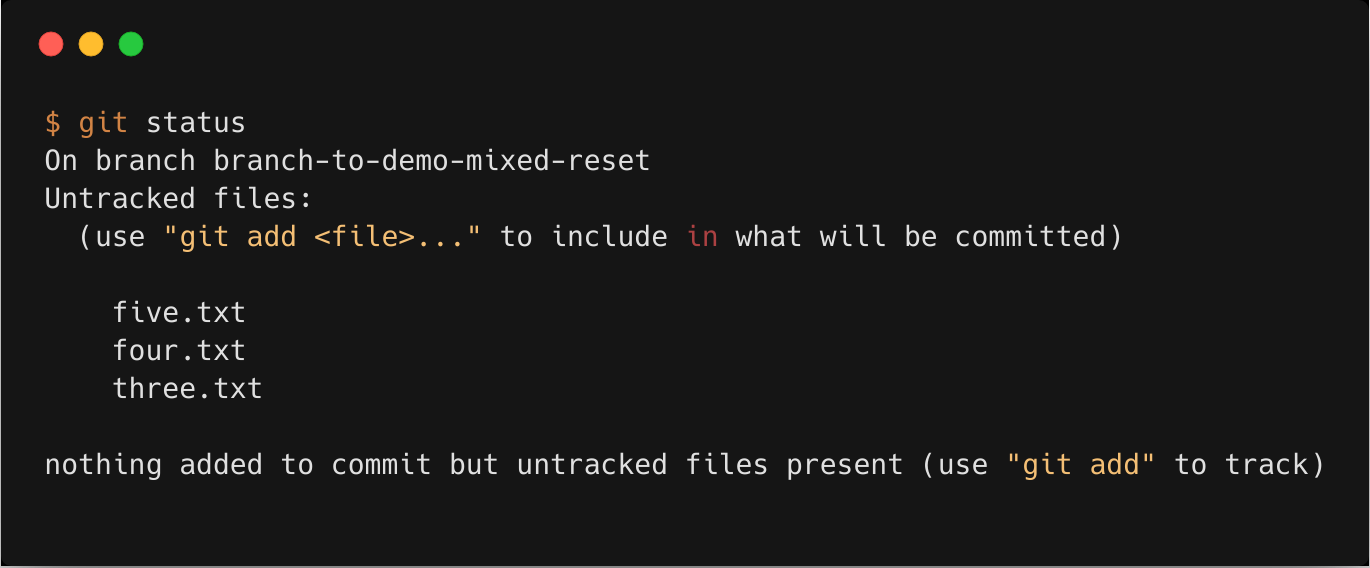
If you want to permanently delete the files then you can run the reset command with the --hard flag.
A good practice you can follow: first run the reset command with the --soft flag and see the affected files. If you are sure that you don’t want those changes then you can run the reset command with the --hard flag.
You should never use git reset <commit-id> when any snapshots after <commit-id> have been pushed to a public repository. Removing a commit that other team members have continued developing poses serious problems for collaboration.
Scenario with revert
You are working in a public repository and you want to undo a commit. Then you can run the following command.
git revert <commit-id> --no-commitAfter running the above command, you can check the affected files using git status. Then you have to make a commit using git commit -m "commit-message".
git revert will not orphan a commit. It will just undo the changes of your reverted commit id.
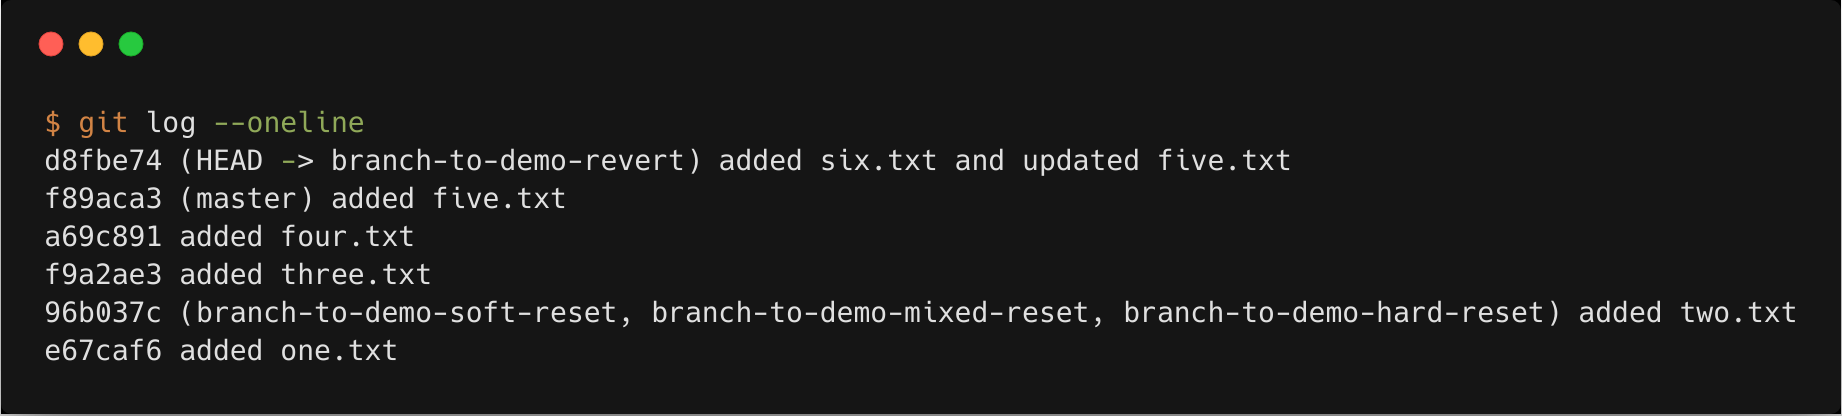
Let’s assume you want to revert the last commit. Then after reverting, your status will look like the following image.
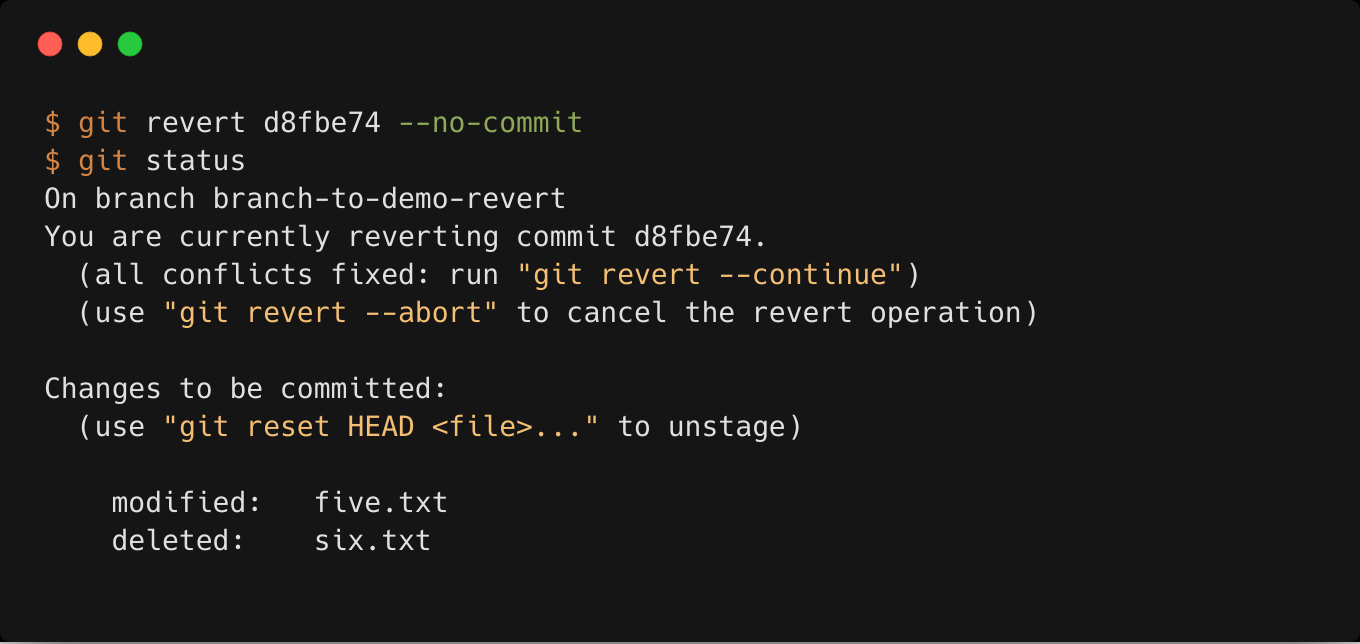
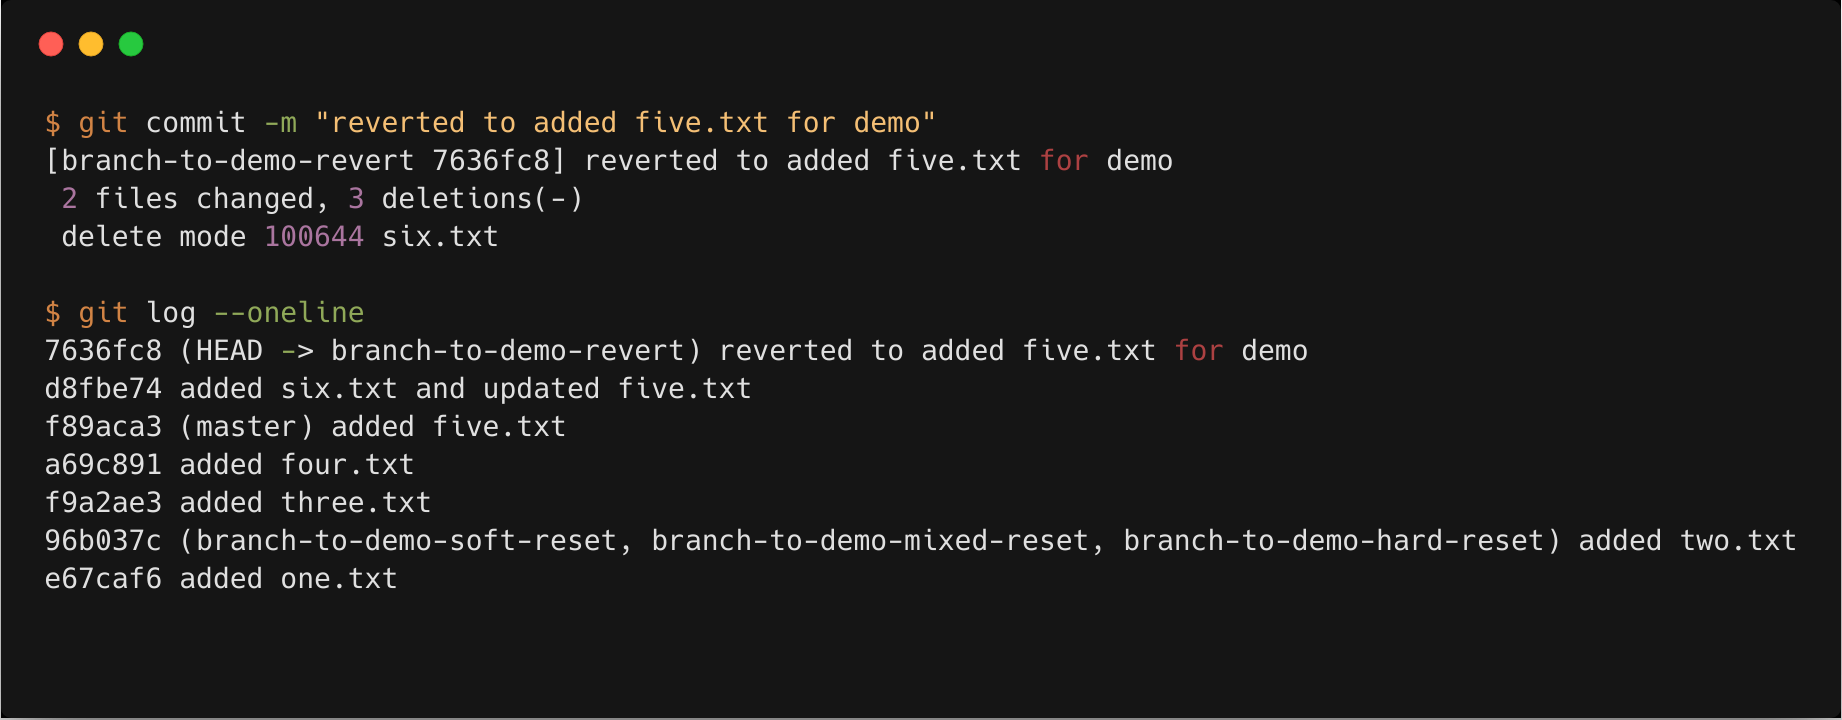
Before the last commit six.txt file was not added, so it is deleted and five.txt is changed back to its previous state. Now, after committing, your commit history will look like this.
You want to revert multiple commits within a range, then you can run the following command.
git revert <oldest-commit-id>..<recent-commit-id> --no-commitIf you want to revert multiple commits that are not within a range, then you have to provide every commit id that you want to revert.
git revert <commit-id-1> <commit-id-2> --no-commitScenario with cherry-pick
You are working in a branch and you need a commit (e.g. a bug fix commit) from another branch to work in your current branch. Then you can use the cherry-pick command to get that commit in your current branch. It is also helpful if you committed in the wrong branch and want the commit in another branch.
First, you have to switch to the branch that has the commit. Copy the commit id of that commit and switch back to your own working branch. Then run the following command to get the commit in your working branch.
git cherry-pick is like copying something from a folder and pasting it in another folder. So it will not delete the commit from where you cherry picked, and in the destination branch the commit id will also be different.
git cherry-pick <commit-id>I am also learning git almost every day and don’t consider myself an advanced git user. So if I made any mistake please feel free to correct me and put your suggestions in the comment section.